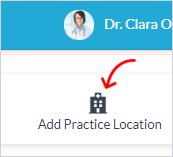
To add a new Practice Location, choose the Add Practice Location option under Settings → Account Settings → Practice Locations.

Add Practice Location trigger
Fill in the mandatory and optional fields and save.
Name: If your organization is a clinic or hospital chain, you might want to name your Practice Location, using a combination of your organization name and the geographical location. Or perhaps just the location name. Whatever will be helpful to your patients.
Timings: The timings of your Practice Location only represent your general working hours across the week. This is for patient information purposes only. It is important to note that actual service or consultations timings used for appointments are defined for each healthcare provider.
Address: If you are a clinic or hospital, your patients will need to know your address.
Contact: You can optionally specify phone numbers and/or an email address to be displayed to patients, if you wish to be contacted by phone or email.
Map: Specify your Google Map location for patients to locate you more easily
Photo: If you are clinic or hospital, displaying a photo can help patients to easily identify whether they have arrived at the right location
Web page: If you already have a web or social media page associated with your Practice Location, that can be added
Display Order: This controls the order of display in the patient portal and other pages. For example you might want to display your main location first and other locations in a particular order.
Once you have saved your new Practice Location, take a moment to see what it looks like in the patient portal home page. See Setting up the Patient Portal Website to further manage the display of the Practice Locations.
